Installation
How do I wire my thermostat?
Download the Sensi app on your smart phone or tablet for easy, step-by-step installation instructions. Learn more by downloading the Sensi Installation Guide which walks you through wiring and connecting to Wi-Fi.
If you are not connecting your Sensi thermostat to Wi-Fi, follow the instructions below to wire and correctly configure your thermostat for your heating and cooling equipment.
Instructions
1. Turn off power
Turn off the power to your heating and air conditioning system at your fuse box, or flip the switch next to your furnace. To confirm power is off, try to turn on heating or cooling by adjusting the temperature on your old thermostat.
2. Remove existing thermostat face plate
Remove the face plate using a screwdriver or by pushing the pressure latch. Some face plates pull off while others need to be released using a screwdriver.
3. Take a photo of your wiring
Take a photo of your existing wiring before removing your thermostat from the wall. This is a very important step and can help if you need to troubleshoot later.
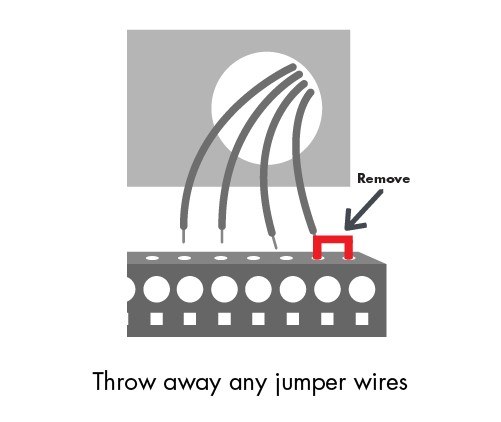
4. Throw away any jumper wires
If you see a jumper wire on your old thermostat, remove it. Your new Sensi thermostat has the jumper wire built into the back of the thermostat faceplate. Leave all other wires connected to the thermostat.
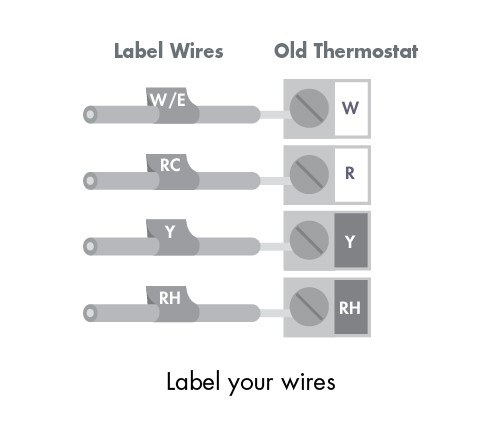
5. Label your wires
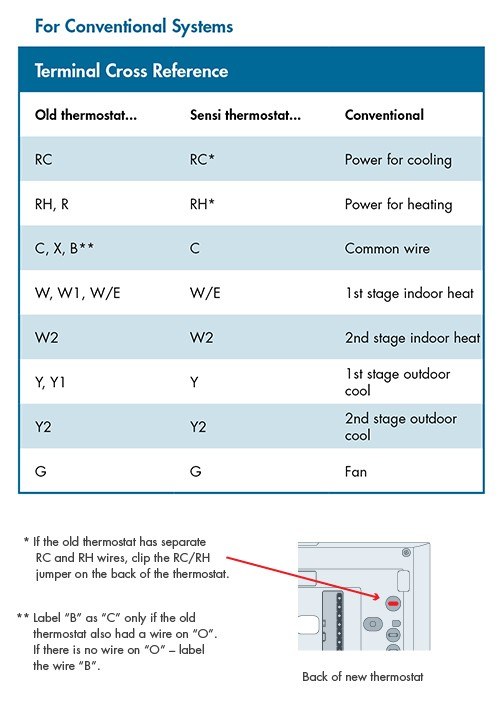
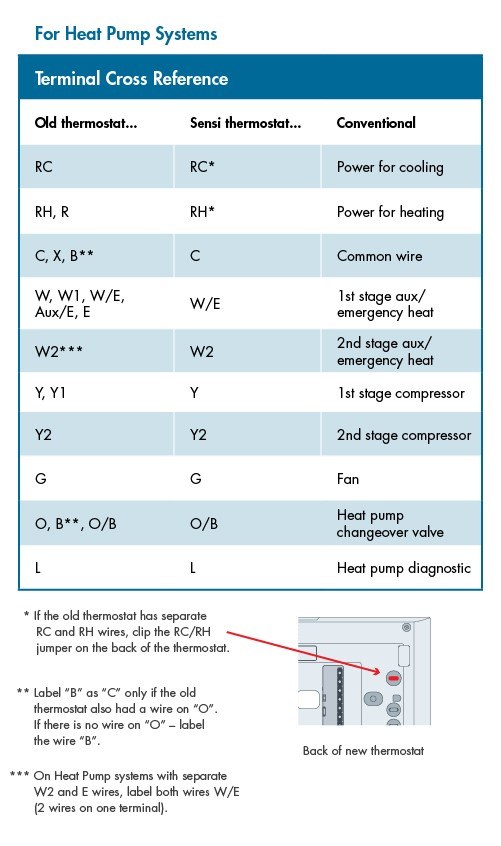
Use the wire labels included with your Sensi packaging to label your wires before removing them from your old thermostat. Label one wire at a time, according to the terminal cross-reference table below that corresponds to your system type.
Notes
- Conventional systems include: boiler, gas furnace, radiant heat, electric heat and air conditioning
- Heat pump systems include: heat pump, dual fuel, geothermal
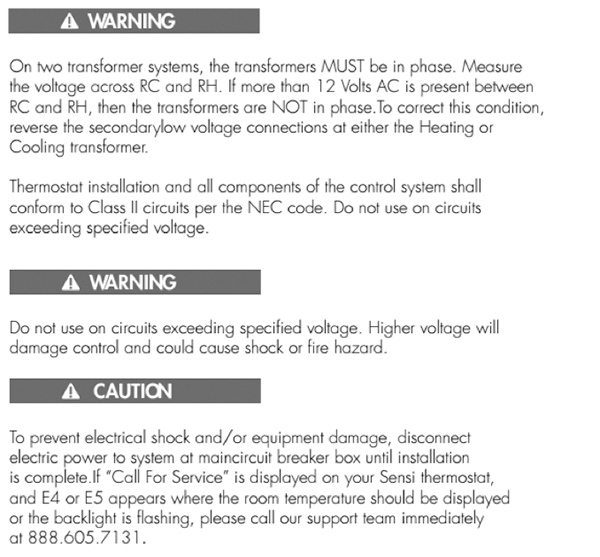
- Sensi thermostat is not compatible with line voltage systems. A line voltage thermostat will typically have wires larger than 18 gauge and may not have terminal labels. If you’re unsure of your system voltage, you or a contractor should measure voltage using a multimeter. Sensi thermostat is rated for 20-30 VAC.
- If your old thermostat has wires attached to the following sets of terminals, the Sensi thermostat is not compatible with your system:
- 1, 2, 3, 4
- A, B, C, D
- V+, VG, RS-, RS+
- R, 1, 2, C
Conventional Systems Terminal Cross Reference
Example: If you have single-stage electric or gas heat, and single-stage air conditioning, the terminals with wires attached on your old thermostat may be: R, W, Y and G. Using the “Conventional Systems” terminal cross reference table, you should label your wires as follows: RH, W/E, Y and G.
Heat Pump Systems Terminal Cross Reference
Example: If you have a single-stage heat pump system with electric back up heat, the terminals with wires attached on your old thermostat may be: R, C, W, Y, G and O/B. Using the “Heat Pump Systems” terminal cross reference table, you should label your wires as follows: RH, W/E, Y, G and O/B.
6. Disconnect wires and remove base
After labeling the wires, remove one wire at a time from the old thermostat base and secure it by wrapping the wire around a pencil. This will keep the wires from falling into the wall. When all of the wires have been secured, remove the sub-base from the wall.
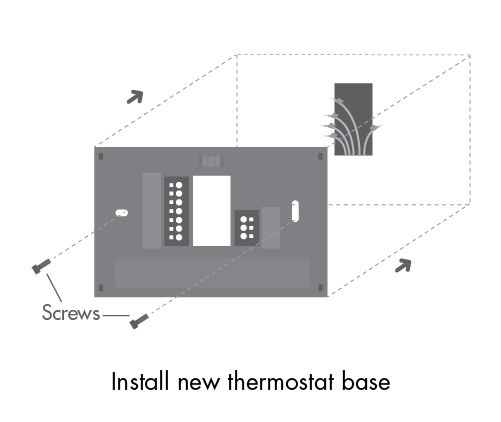
7. Install new thermostat base
Mount your new Sensi thermostat base using the supplied screws, drilling holes if necessary.]
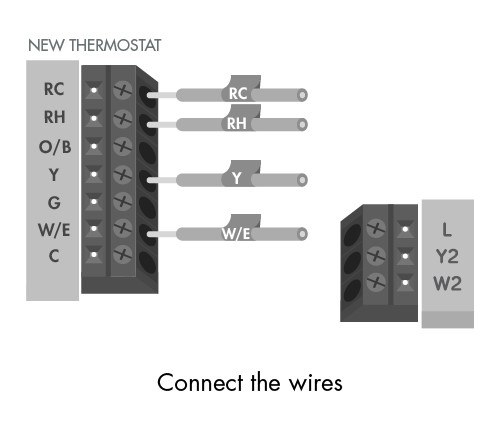
8. Connect the wires
Use a small screwdriver to loosen the terminal screws on the Sensi thermostat base, and insert each labeled wire into the corresponding terminal. Tighten the terminal screws to secure the wires in place.
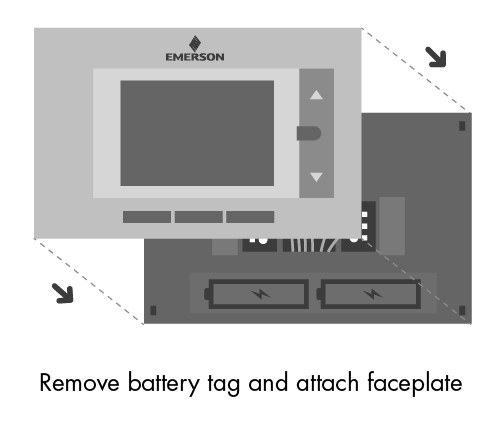
9. Attach face plate
Tuck the wires into the wall keeping them flush so the thermostat snaps in place. Remove the battery tag from the back of the face plate and snap the face plate onto the base.
10. Configure the thermostat
Once your Sensi thermostat is wired and installed on the wall, configure the thermostat based on your system type. Refer to the Configuration Menu table below.
Press Menu and use the Next button to scroll through the configuration menu. Use the Up and Down arrows to change the configuration. Press Exit when finished.
Notes
For Outdoor Equipment Configuration
- You have single stage conventional cooling or heat pump system if you have one wire connected to the Y terminal on the Sensi thermostat base, and no wire connected to the Y2 terminal.
- You have two stage conventional cooling or heat pump system if you have one wire connected to the Y terminal, and a separate wire connected to the Y2 terminal on the Sensi thermostat base.
For Indoor Equipment Configuration
- You have a single stage gas furnace, boiler or electric furnace if you have one wire connected to the W/E terminal on the Sensi thermostat base, and no wire connected to the W2 terminal.
- You have two stage gas furnace, boiler or electric furnace if you have one wire connected to the W/E terminal, and a separate wire connected to the W2 terminal on the Sensi thermostat base.
For Reversing Valve Position
- Most heat pump manufacturers use “O” as the default for reversing valves. Consult your equipment manual to see if you need to adjust this setting.
